Quick Facts
- Category
- Nage-Waza
- Subcategory
- Koshi-Waza
- Difficulty
- Beginner
- Belt Level
- 6th kyu, 5th kyu
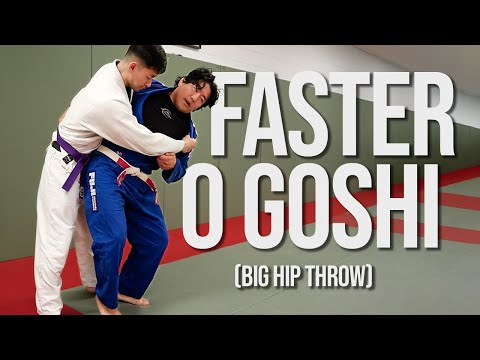
O-Goshi is the foundational hip throw of judo and one of the first techniques taught to beginners worldwide. Tori wraps their arm around uke's waist, pivots to place their hip in front of uke's hips, and uses the hip as a fulcrum to lever uke over and to the mat. It teaches the essential mechanics of koshi-waza: entry, hip placement, and leverage.

O-Goshi — Step by Step
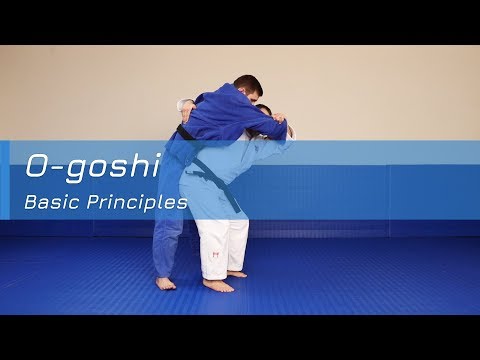
Pull uke forward and slightly upward with your sleeve grip, breaking their balance to their right front corner. Raise their arm upward to tilt their body and get them rising onto their toes.
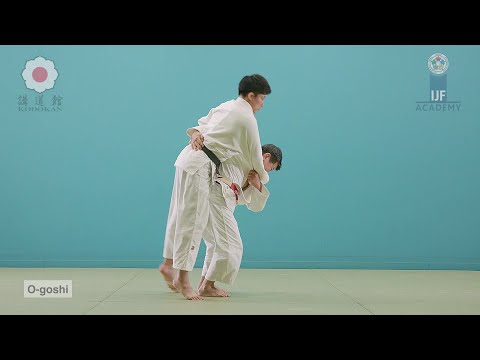
Step your right foot in front of and just inside uke's right foot, then pivot on it to bring your left foot around so your back faces uke's front. As you enter, wrap your right arm firmly around uke's waist. Your right hip must be positioned in front of and against uke's right hip — the contact point is critical.
Bend forward at the waist, pulling uke's sleeve arm sharply downward while keeping the waist arm grip firm. Your hip acts as the fulcrum — uke's weight pivots over it. Straighten your legs simultaneously to assist loading uke's weight onto your hip. Uke is projected forward to the mat.
- 1
Pull uke forward to break balance (kuzushi)
Use your sleeve grip to pull uke's arm upward and toward their right front corner. Your lapel hand lifts. Uke should lean onto their toes.
- 2
Step your right foot in with toes pointed forward
Step your right foot in front of and just inside uke's right foot. Your toes point in the same direction as uke's.
- 3
Pivot and wrap the waist
Pivot on your right foot and swing your left foot around to complete the body turn. Simultaneously slide your right arm around uke's waist and grip firmly. Your back must be against uke's chest.
- 4
Position your hip as the fulcrum
Your right hip should press firmly into uke's lower abdomen/hip area. Bend your knees slightly so your hip level is lower than uke's hip, then straighten them to load uke's weight onto your hip.
- 5
Project uke over the hip
Bend forward at the waist while pulling uke's sleeve arm sharply downward. Uke's body pivots over your hip and they land on the mat in front of you.
What Makes It Work
- The hip contact must be firm and direct — your hip against uke's hip is the lever. Any gap reduces effectiveness.
- Waist arm grip: wrap deeply around uke's midsection, not just touching their back.
- Bend forward during kake to complete the lever action — remaining upright blocks the rotation.
- O-Goshi teaches the template for all koshi-waza: enter, place hip below uke's hip, load, project.
What to Avoid
Hip placed too low (around uke's thighs)
Your hip should contact uke at their hip level. Too low and you cannot lever them; too high and they simply step over you.
Not bending forward during kake
The throw requires you to bow forward. If you stay upright, uke simply gets lifted — not thrown.
Waist arm grip too loose
Pull uke tightly into your back. A loose waist grip allows uke to create space and escape the throw.
Feet too close together during entry
Your feet should be roughly shoulder-width apart after the pivot. Too narrow and you have no base; too wide and you cannot generate hip drive.
Best Moments to Apply O-Goshi
O-Goshi is most effective against shorter or same-height opponents where hip-level leverage is accessible. It is a foundational learning throw — at competitive levels it is often replaced by Harai-Goshi or Uchi-Mata, which require less full-body contact. However, O-Goshi remains valid as a combination element and against ukes with an upright, rigid posture.