Quick Facts
- Category
- Nage-Waza
- Subcategory
- Koshi-Waza
- Difficulty
- Intermediate
- Belt Level
- 4th kyu, 3rd kyu
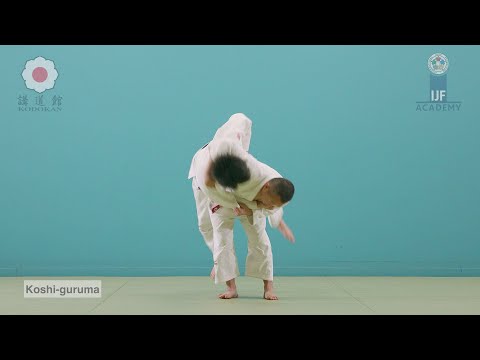
Koshi-Guruma is a hip throw in which tori wraps their arm around uke's neck and uses the hip as a wheel to rotate uke over and to the mat. Unlike O-Goshi where the arm encircles the waist, Koshi-Guruma places the arm around uke's head and neck, creating a higher fulcrum point that generates a powerful wheeling rotation. This technique is particularly effective against opponents who resist by dropping their hips.

Koshi-Guruma — Step by Step
Pull uke forward and upward onto their right front corner using your sleeve grip. Simultaneously use the lapel arm to pull uke's upper body toward you, encouraging them to lean forward. Uke's weight should shift to their toes and their upper body tilt toward you.
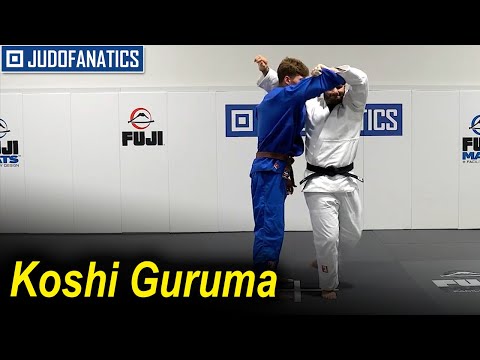
Step your right foot in deep, placing it between uke's feet with toes turned out. Pivot sharply on the right foot to bring your left foot across so your back is fully toward uke's front. As you turn, slide your right arm over uke's shoulder and around the back of their neck, locking their head against your right shoulder. Your hip must make solid contact with uke's hip region.
With the arm firmly controlling uke's head and neck, bend forward from the hips while pulling uke's sleeve arm down and across. The hip acts as the wheel's axle — uke's body rolls over your hip in a circular arc. Drive your hip through and straighten your legs to complete the projection, sending uke forward and down to the mat.
- 1
Break uke's balance forward
Pull uke's sleeve upward and toward their right front corner. Your lapel hand draws their upper body toward you until their weight is on their toes.
- 2
Step in and begin the pivot
Step your right foot inside and in front of uke's right foot, toes angled outward. Begin your 180-degree pivot on the right foot.
- 3
Complete the turn and wrap uke's neck
Swing your left foot around to complete the pivot. Slide your right arm up and around uke's neck, securing their head against your shoulder. Your back should be pressed against uke's chest.
- 4
Load uke onto your hip
With knees slightly bent, your hip should be at or just below uke's centre of gravity. Straighten your legs to lift uke's weight onto your hip.
- 5
Execute the wheel — bend and throw
Bend sharply forward from the waist, driving your right elbow down and pulling the sleeve hand across and down. Uke wheels over your hip and is projected forward to the mat.
What Makes It Work
- The neck/head arm must lock uke's upper body firmly against your shoulder — any looseness allows uke to pull their head free.
- Hip contact must be solid: your right hip presses into uke's right hip before the bend-and-throw phase.
- The "wheel" motion requires a sharp forward bend — your torso drives down to initiate the rotation.
- Keep uke close throughout the entry; distance between bodies kills the leverage.
What to Avoid
Arm placed too loosely around uke's neck
Drive your arm deep around the neck and press uke's head firmly into your shoulder. A loose arm lets uke straighten up and escape.
Failing to complete the full pivot
Your back must be fully facing uke's chest. A half-turn means your hip is to the side rather than in front, losing the wheel axis.
Remaining upright during kake
The throw is completed by bending sharply forward. Staying upright reduces the throw to a lift rather than a wheel.
Placing the neck arm too high on uke's head
The arm should wrap around the back of the neck at shoulder level, not around the skull. Too high puts strain on uke's neck and reduces control.
Best Moments to Apply Koshi-Guruma
Koshi-Guruma works well against an opponent who bends forward at the waist or who has a defensive, head-down posture. The neck wrap is difficult to establish against a very upright, stiff opponent. It pairs well as a follow-up to failed O-Goshi attempts — when uke resists the waist wrap, transitioning the arm to the neck completes the entry.