Quick Facts
- Category
- Katame-Waza
- Subcategory
- Shime-Waza
- Difficulty
- Intermediate
- Belt Level
- 3rd kyu, 2nd kyu, 1st kyu
Gyaku-Juji-Jime is a cross-collar choke in which both of tori's thumbs are inserted inside uke's collar — thumbs-in rather than the fingers-in grip of Nami-Juji-Jime. The thumbs-in grip pulls the collar edges outward and into the sides of uke's neck, compressing the carotid arteries. Gyaku ("reverse") refers to the reversed grip orientation compared to Nami-Juji-Jime. This choke is applied from a top position (mount, side control, or guard) and is one of the most reliable submission techniques in judo ground work.
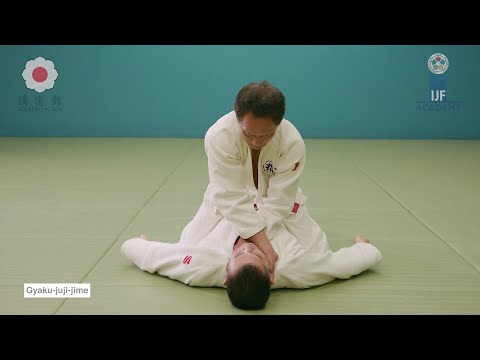
Gyaku-Juji-Jime — Step by Step
From a mounted or top position, control uke's upper body by keeping chest pressure and body weight down. Before gripping, ensure uke's collar is accessible — widen the lapel with one hand if needed. Uke's defensive movements (bridging, pushing) are neutralised by maintaining close body contact.
Insert your right thumb into uke's left collar (your right, their left) as deep as possible toward the back of the neck. Then insert your left thumb into uke's right collar, crossing over your right arm. Both thumbs point toward uke's spine at the back of the collar. The crossed arms form an X shape (juji = cross/X).
With both thumbs deep in the collar, rotate your wrists outward (thumbs rotating away from each other) while pulling the collar edges forward and outward. This action drives the collar edges into the sides of uke's neck, compressing the carotid arteries bilaterally. Simultaneously drop your chest onto uke to add body weight pressure.
- 1
Establish top control position
Secure a dominant top position — mount, modified mount, or kesa-gatame. Press your body weight onto uke to limit their movement.
- 2
Open uke's collar
If the collar is tight, use one hand to widen the lapel opening near the back of the neck to allow deep thumb insertion.
- 3
Insert the first thumb (right hand)
Insert your right thumb inside uke's left collar, sliding as deep as possible toward the back of the neck. Thumb points toward spine.
- 4
Cross and insert the second thumb (left hand)
Cross your left arm over your right and insert your left thumb inside uke's right collar. Left arm is on top of the cross.
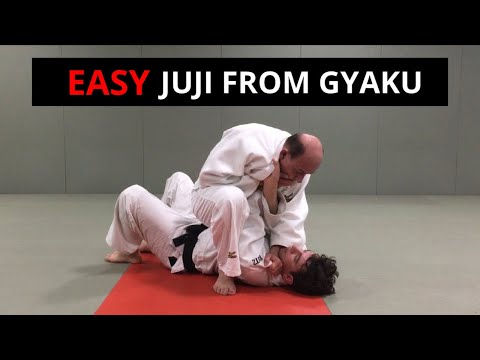
- 5
Apply the choke
Rotate both wrists outward while pulling the collar edges forward and apart. Drop your chest onto uke. Maintain pressure until submission.
What Makes It Work
- The thumbs must be inserted as deep as possible — a shallow grip means the collar edge cannot reach the carotid arteries.
- The wrist rotation (outward) is the choking mechanism — pulling without rotating produces a weaker choke.
- Body weight augments the arm pressure — leaning your chest onto uke multiplies the effectiveness.
- Crossed arms (X pattern) is essential — parallel arms mean both collar edges pull in the same direction, reducing bilateral carotid compression.
What to Avoid
Shallow thumb insertion (fingers on collar, thumb barely inside)
Push the thumb as far inside the collar as possible, ideally to the second knuckle at minimum. Shallow insertion prevents the collar edge from reaching the carotid.
Pulling collar forward without rotating wrists
The wrist rotation (thumbs rotating outward) is what drives the collar edge into the neck. A pure pull compresses the front of the neck (trachea) rather than the sides (carotids).
Arms not crossed (parallel instead of X)
The arms must cross. If both thumbs pull in the same direction, only one side of the neck is compressed.
Top body too far from uke's face
Drive your chest toward uke's face to add weight to the choke. Sitting upright relies entirely on arm strength.
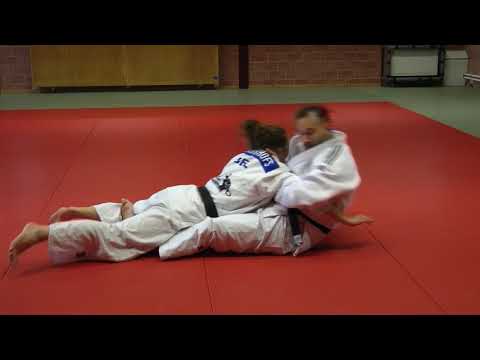
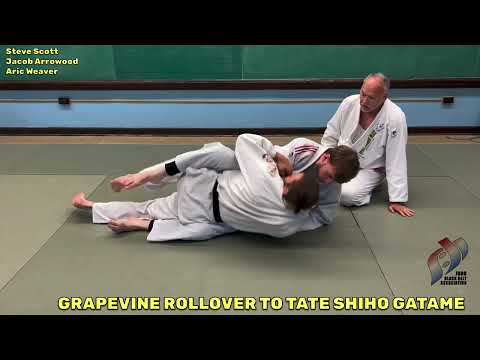
Best Moments to Apply Gyaku-Juji-Jime
Gyaku-Juji-Jime is effective from mount (Tate-Shiho-Gatame) and from a modified top position after a failed throw transition. It works especially well when uke attempts to push up with both hands — their extended arms give tori access to both collars. It is an excellent response to uke's upward arm push from the bottom position.